
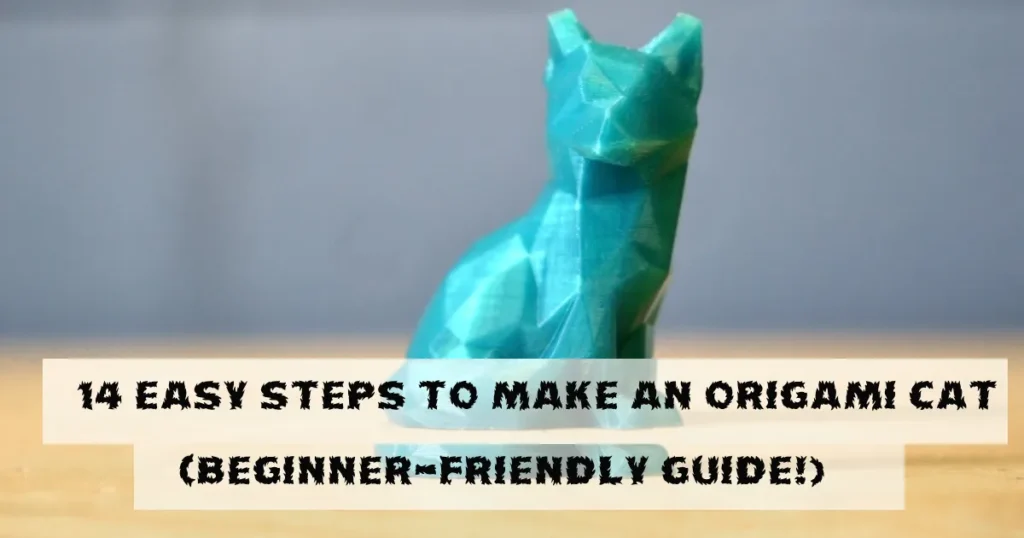
Have you ever wanted to create your own adorable paper cat without scissors or glue? Origami, the Japanese art of paper folding, offers the perfect solution! In this comprehensive tutorial, I’ll guide you through creating a charming origami cat using just two sheets of paper. This project is perfect for beginners and makes for a delightful decoration or handmade gift.
What You’ll Need
- Two square sheets of paper (origami paper works best, but any square paper will do)
- A flat surface to work on
- About 15-20 minutes of time
- Patience and a willingness to learn!
The Magic of Origami Cats
Origami cats have been popular for generations, combining simplicity with charm. They’re perfect for teaching children basic folding techniques while creating something they’ll be proud to display. The two-piece design we’re making separates the head and body, allowing for more detail and character than single-sheet designs.
Head Section (Steps 1-9)
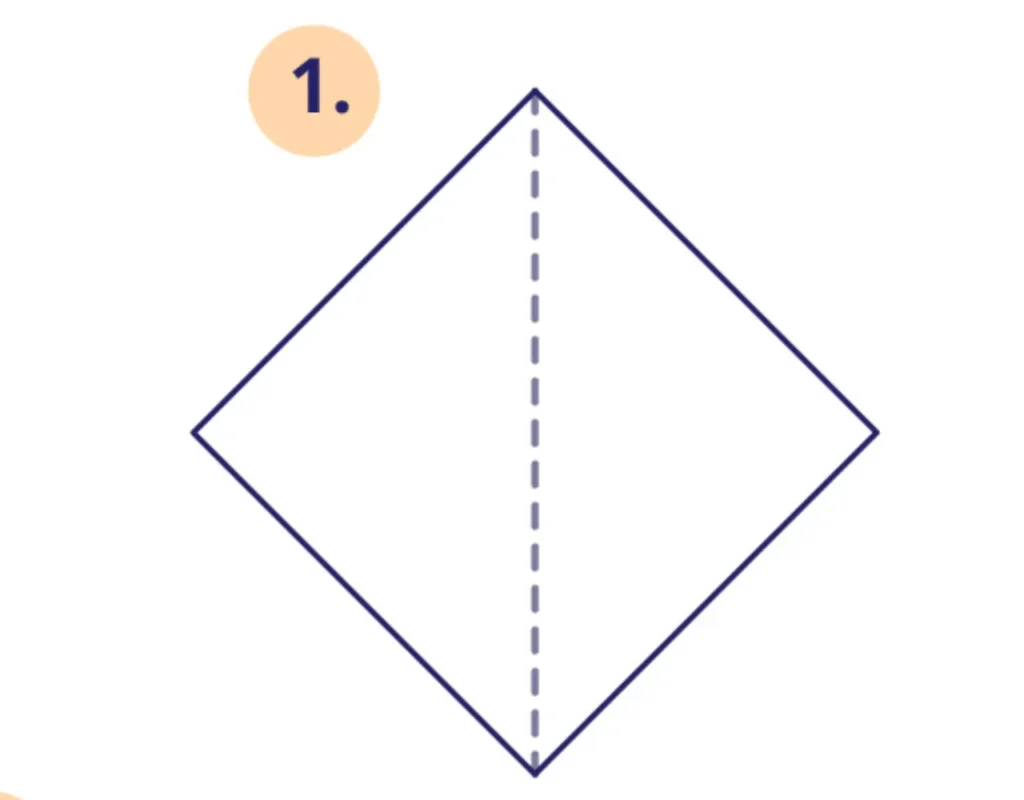
Step 1: Start with a Square

Begin with a square piece of paper. If you’re using regular paper, you’ll need to create a square first. Place it color-side down if you’re using dual-colored paper (the colored side will be the outside of your cat).
Fold your square diagonally from one corner to the opposite corner, creating a triangle. Make sure to align the edges perfectly and create a sharp crease by running your finger firmly along the fold.
Step 2: Create the Basic Triangle Structure

With the triangle pointing up, fold down the top point to create a smaller triangle. This fold should come down about halfway, creating what will become the face portion of your cat. Press firmly along the crease to secure it.
Step 3: Form the Base Structure

Take the bottom triangle (the one underneath your recent fold) and fold it upwards along the marked line. This fold should meet the edge of your previous fold, creating a multi-layered triangular structure. This will serve as the foundation for your cat’s face.
Step 4: Shape the Ears
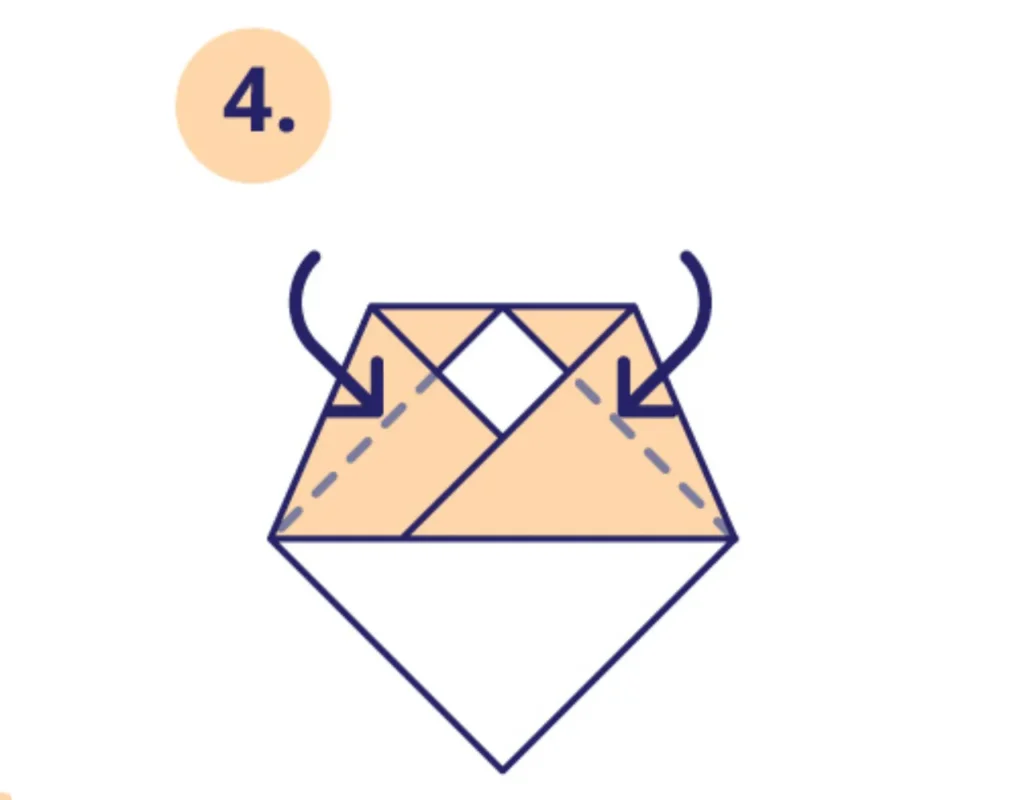
Now for the fun part! Fold both top corners inwards to create the cat’s ears. These folds should be at roughly 45-degree angles, creating two triangular points at the top of your structure. The distance between the ears will determine how wide your cat’s face appears.
Step 5: Refine the Ears
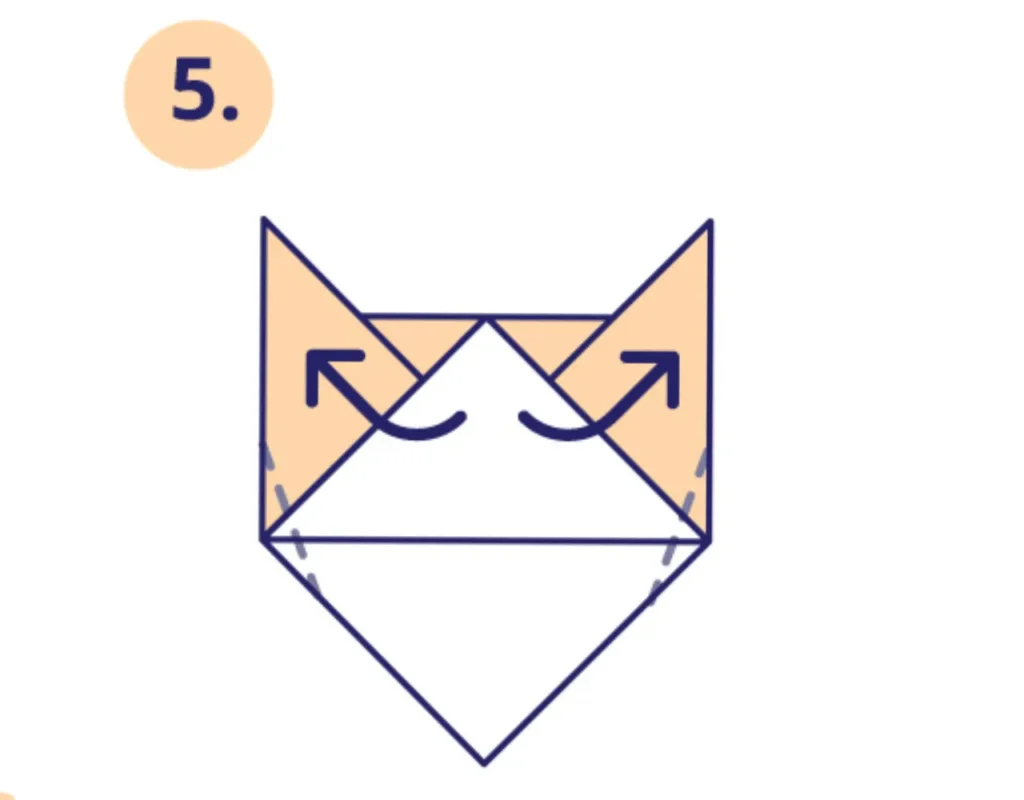
Gently adjust the ear folds to achieve the perfect cat-like appearance. You can make them more pointed for an alert look or slightly rounded for a friendlier expression. This is where your origami cat begins to take on its personality!
Step 6: Secure the Structure

Carefully press along all edges to reinforce your folds. Pay special attention to the ear sections, as these will need to hold their shape well. The sharper your creases, the more defined your finished cat will appear.
Step 7: Shape the Face

Flip your creation over and fold the bottom flap back to shape the cat’s face. This fold should be about one-third of the way up from the bottom point. This creates the lower part of the face and defines where you’ll later add features.
Step 8: Create Facial Symmetry

Examine your work and make slight adjustments to ensure symmetry. The ears should be evenly sized and positioned, and the face should have a balanced, triangular appearance. Small adjustments now will make a big difference in your final result.
Step 9: Complete the Head

For the finishing touch on the head, fold the bottom tip upwards slightly to complete the cat’s chin area. This small fold adds dimension to your cat’s face and creates a more three-dimensional appearance. Your cat’s head is now complete!
Body Section (Steps 1-5)
Step 1: Prepare Your Second Square
Take your second square of paper (ideally the same color as your first sheet, though a contrasting color can create interesting effects). Place it in front of you as a square, color-side down if using dual-colored paper.
Step 2: Create the Basic Body Shape

Fold both sides inward along the center, creating what looks like a long rectangle with a center crease. Each side should fold exactly to the center line. This will form the elongated structure needed for your cat’s body.
Step 3: Shape the Body

Fold this long rectangle in half lengthwise, bringing the bottom edge up to meet the top edge. This creates a more compact shape that will become your cat’s torso. The folds should be crisp and even.
Step 4: Form the Tail

At one end of your folded rectangle, create the cat’s tail by folding a small section at approximately a 45-degree angle. You can adjust the angle to create different tail positions – straight up for an alert cat or more horizontal for a relaxed pose.
Step 5: Combine Head and Body

Now comes the moment of truth – bringing your two pieces together! The head should sit neatly at the end opposite to the tail. You can secure them with a tiny dab of glue if desired, though skilled folders can position them to stay together without adhesive.
Adding Personality to Your Origami Cat
Once you’ve completed the basic structure, you can personalize your cat in several ways:
Drawing Facial Features
Using a fine-tipped pen, you can add eyes, whiskers, and a small nose to bring your cat to life. Keep these details simple – two small dots for eyes, a tiny triangle for the nose, and a few lines for whiskers create the perfect feline expression.
Creating Multiple Cats
Once you’ve mastered this technique, try making a family of cats in different sizes and colors. A set of origami cats makes for charming decorations or thoughtful handmade gifts.
Experimenting with Paper
While traditional origami paper works beautifully, don’t be afraid to experiment! Patterned paper can create cats with “fur markings,” while metallic paper creates elegant, shimmering cats perfect for special occasions.
Troubleshooting Common Issues
Problem: Uneven Ears
Solution: Unfold and carefully refold, ensuring both ear folds start from the same position and are folded at identical angles.
Problem: Cat Won’t Stand Properly
Solution: Make sure the bottom folds of both the head and body are flat and even. You might need to adjust the angle where the head and body meet.
Problem: Creases Not Holding
Solution: Take time with each fold, applying firm pressure with your finger or a folding tool. High-quality paper also helps maintain crisp folds.
Why Origami Cats Are Great for Beginners
This two-piece origami cat is ideal for beginners because:
- It breaks the process into manageable sections
- It doesn’t require complex folds like inside reverse folds
- Mistakes in one section don’t ruin the entire project
- The result is recognizable and rewarding
- The skills learned transfer to other origami projects
Taking Your Origami Skills Further
Once you’ve mastered this beginner-friendly cat, you might want to explore more advanced feline designs. The origami world offers everything from simple sitting cats to complex, multi-step designs with detailed features.
Conclusion: Your Origami Journey Begins!
Congratulations on creating your very own origami cat! This project introduces fundamental folding techniques while producing a charming result you can be proud of. Remember, origami is as much about the journey as the destination – each fold brings you closer to mastering this ancient art form.
Keep practicing, and soon you’ll be creating origami cats with your own creative variations. Happy folding!
Helpful Resources
For those looking to expand their origami skills beyond this tutorial:
- Origami USA: A national organization dedicated to the art of paper folding with resources for all skill levels
- Origami Resource Center: Offers free diagrams, tips, and techniques
- “Origami for Beginners” by Florence Temko: An excellent book for building foundational skills
- The Origami Forum: An online community where you can share your creations and get advice
Remember, the joy of origami comes from practice and patience. Each cat you create will be better than the last as your folding skills improve!