

Origami, the Japanese art of paper folding, offers a wonderful way to create beautiful objects using just a sheet of paper. Among the many designs, the origami dog stands out as a perfect project for beginners. In this guide, I’ll walk you through creating an adorable paper pup in just seven easy steps!
Why Try Origami Dogs?
Before we dive into folding, let’s talk about why origami dogs make such great starter projects:
- They require minimal materials (just paper!)
- The techniques are straightforward
- They’re perfect for crafting with kids
- The finished product makes a cute decoration
Materials You’ll Need
- Square pieces of paper (origami paper works best, but any paper cut into a square will do)
- Pencil for adding details
- Optional: glue for attaching parts
Step 1: Start with a Square Piece of Paper
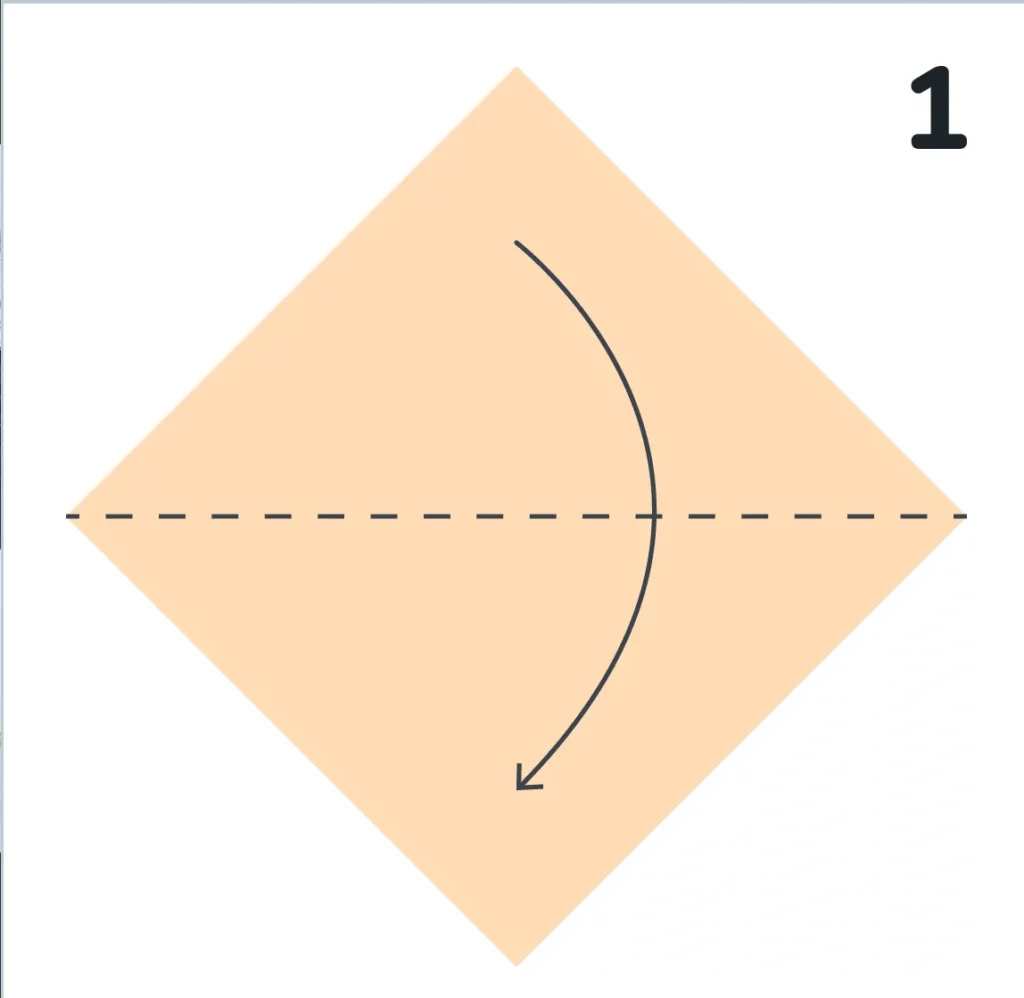
Every origami project begins with the right foundation. For our dog:
- Select a square piece of paper (6″ × 6″ is ideal for beginners)
- Position it with one corner facing you
- Fold it diagonally in half to form a triangle
- Crease firmly and unfold
This diagonal fold creates the central axis for your dog design and establishes symmetry for the following steps.
Step 2: Fold the Top Corners
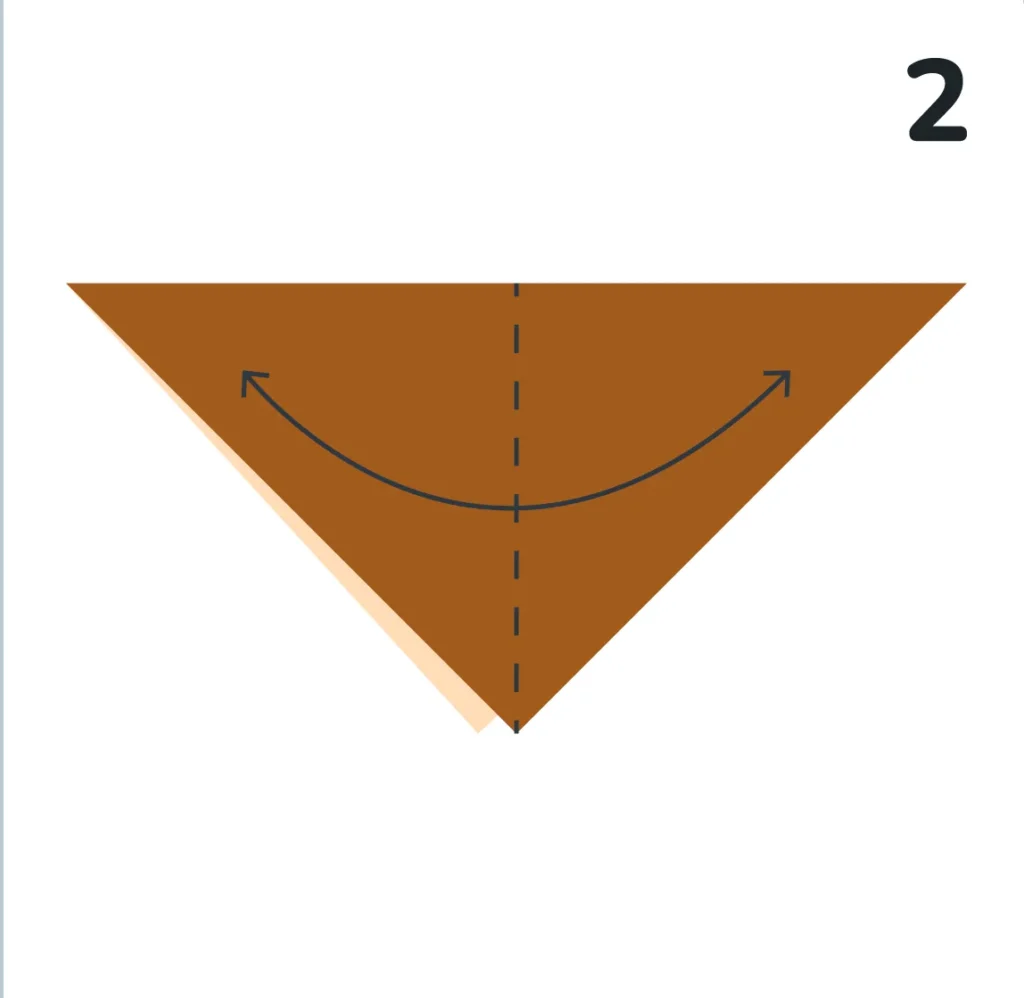
Now it’s time to create your dog’s distinctive ears:
- Take the top corners of the triangle
- Fold them downward toward the center point
- Leave about 1/3 of the bottom portion unfolded
- Make sure both ear folds are even in size
These folds will become your dog’s ears, so take your time to get them symmetrical.
Step 3: Adjust the Folds to Shape the Face

This step is where your dog’s personality begins to emerge:
- Gently adjust the ear folds to the desired angle
- Ensure both sides are symmetrical
- Reinforce the creases by pressing firmly
- Shape the face by slightly rounding the center fold
The angle of the ear folds determines whether your dog looks perky, floppy-eared, or alert.
Step 4: The Dog’s Head is Complete!

Congratulations! You now have a basic origami dog face. Take a moment to:
- Double-check your folds for symmetry
- Make any final adjustments to the ears
- Flatten the head shape evenly
- Admire your work—you’ve created the most recognizable part!
Step 5: Create the Dog’s Body
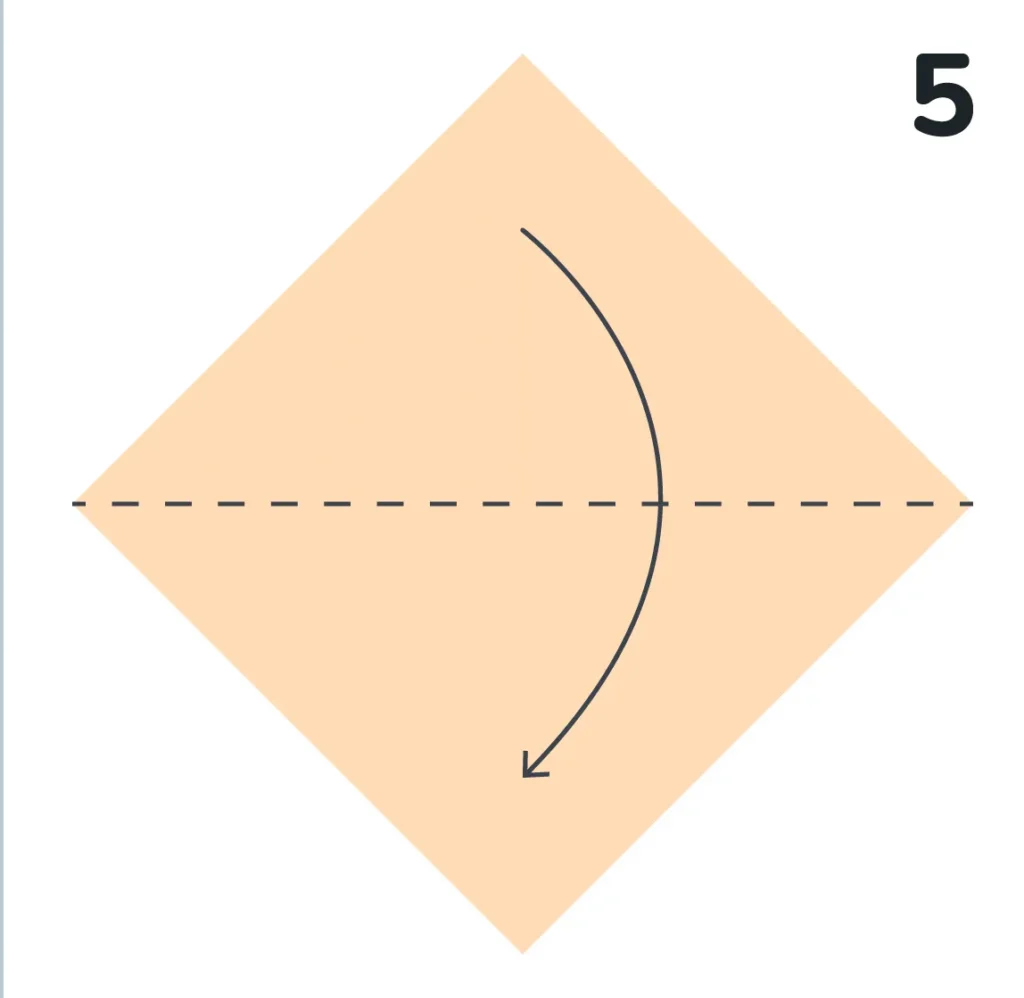
To give your pup a complete form:
- Take another square piece of paper
- Fold it diagonally to create a triangle
- Position the triangle with the longest edge facing up
- Make sure the paper is the same size as what you used for the head
The body will provide structure and balance to your origami dog.
Step 6: Fold the Triangle in Half
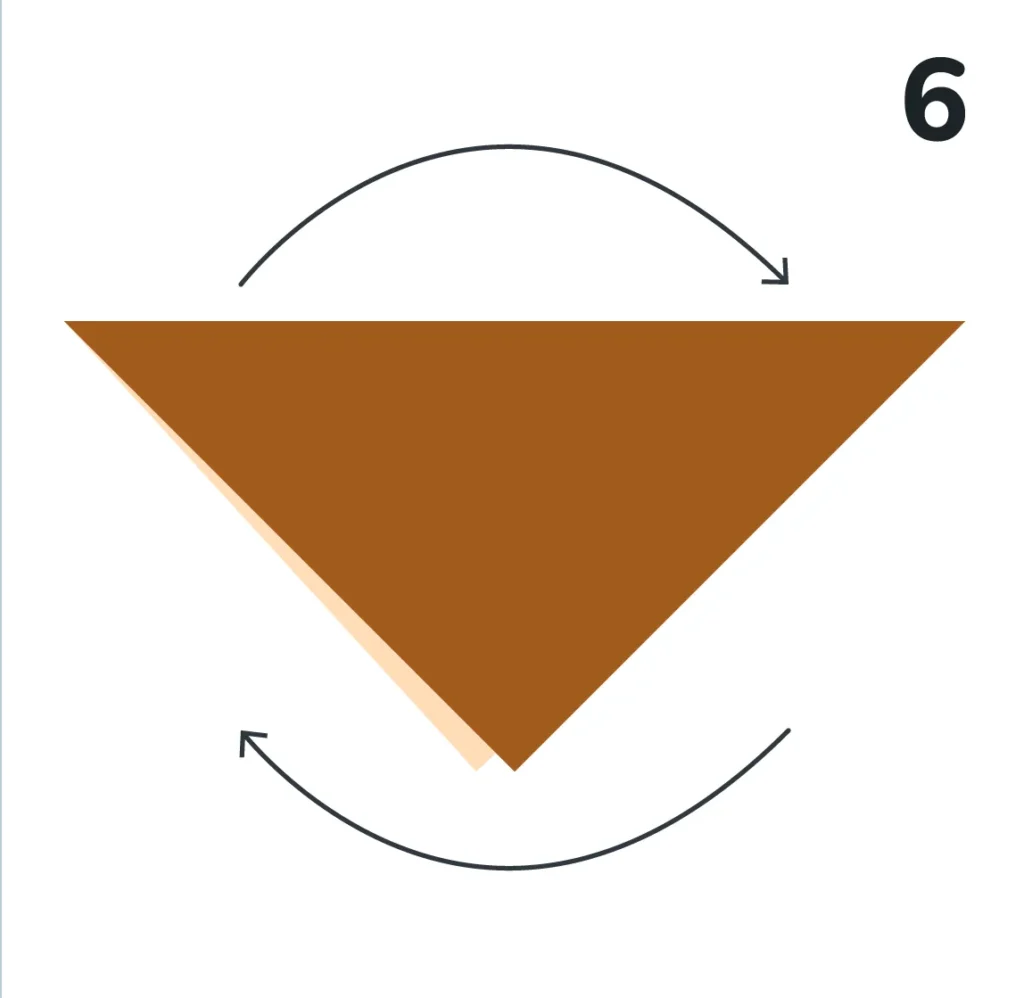
Adding dimension to your dog’s body:
- Take the triangle from step 5
- Fold it in half by bringing the right corner to meet the left
- Crease firmly to create a smaller triangle
- This gives your dog’s body more stability and structure
This fold creates the layers needed for a three-dimensional appearance.
Step 7: Attach the Head and Body
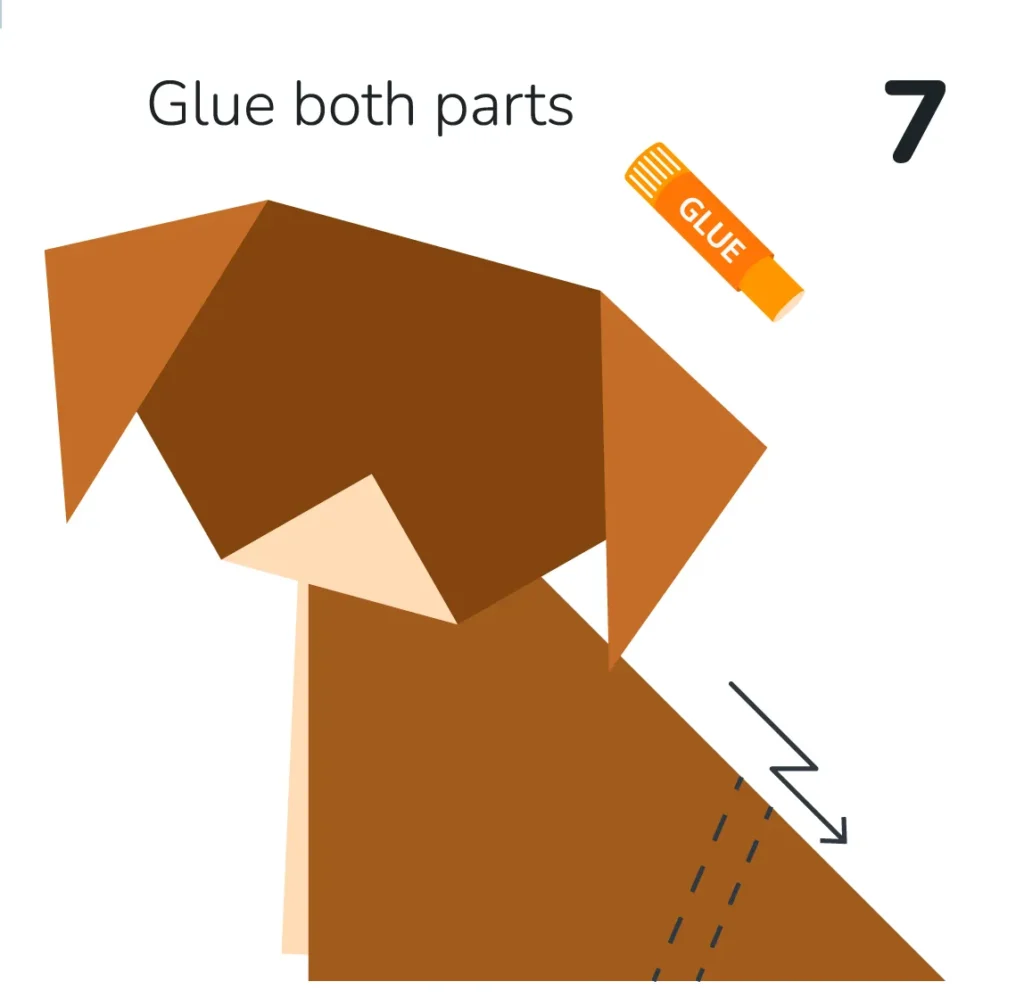
Bringing it all together:
- Position the head at the top of the folded body
- Apply a small amount of glue where the head meets the body
- Hold firmly for a few seconds until secure
- Make sure the head is centered on the body
Final Details
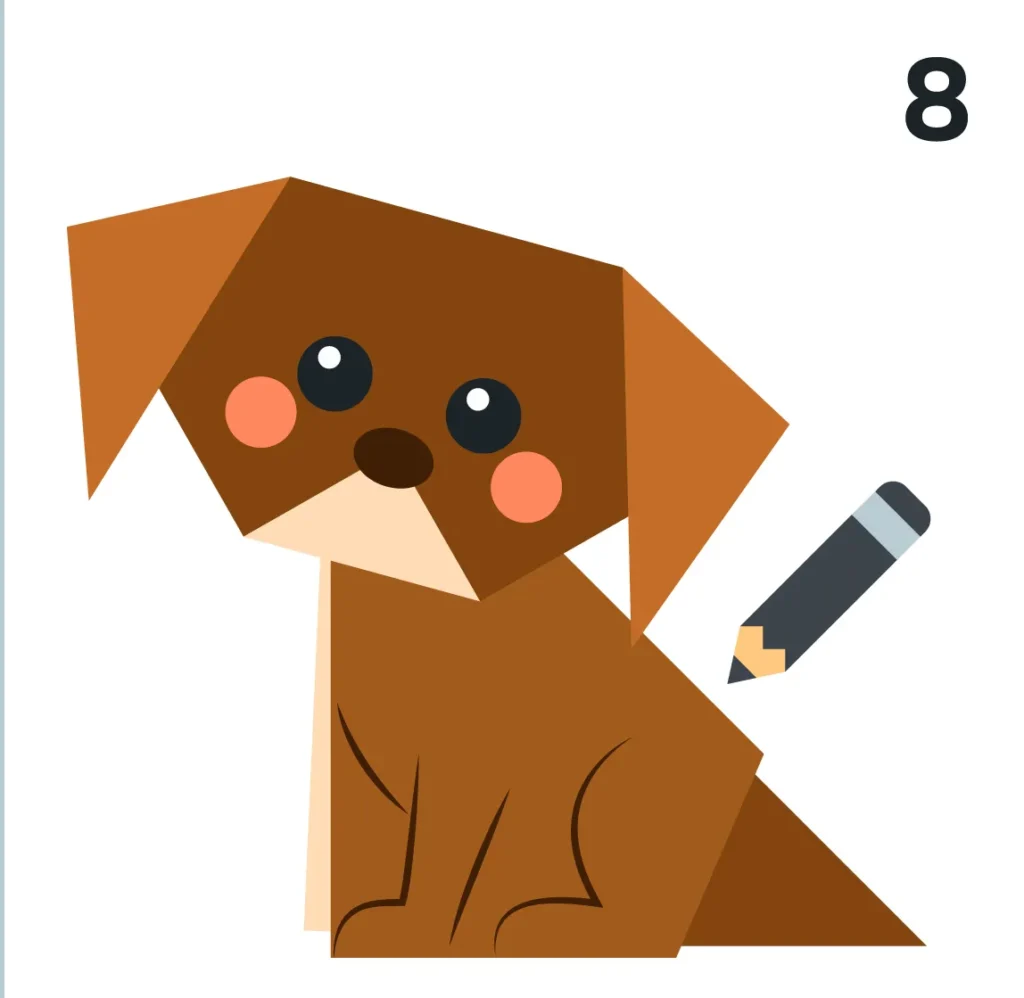
Now that your origami dog is assembled, it’s time for personalization:
- Use a pencil to draw eyes, a nose, and a mouth
- Add spots or patterns if desired
- Consider drawing a collar or other details
- Display your creation proudly!
Tips for Success
- Use crisp, new paper for cleaner folds
- Take your time with each step
- If you make a mistake, it’s okay to start over
- Practice makes perfect—try creating dogs in different sizes and colors
Conclusion
Creating an origami dog is a delightful introduction to the art of paper folding. With just a few simple folds, you’ve created a charming paper companion that showcases your creativity. As you become more comfortable with these basic techniques, you can experiment with more complex designs or create an entire pack of origami dogs!
Happy folding!